

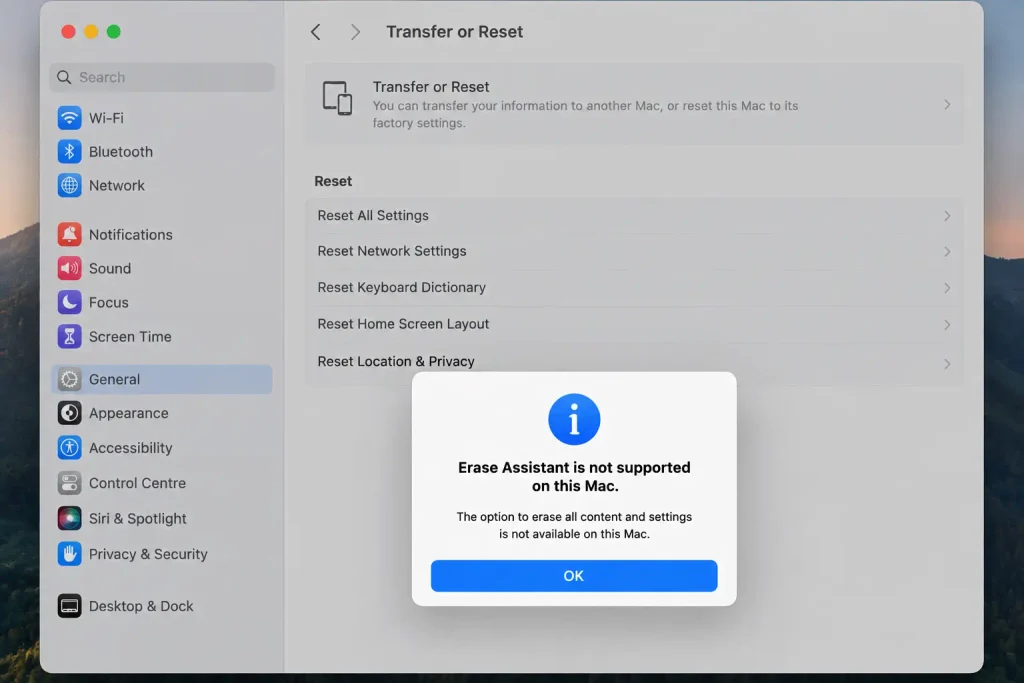
“Erase Assistant is not supported on this Mac” appears when you try to use Erase All Content and Settings and your Mac doesn’t meet the requirements for it, or something is actively blocking it. The error looks like a dead end but it isn’t. There are five distinct reasons it appears and a different fix for each one.
This guide identifies which scenario applies to you first, then walks through the correct fix for that scenario. Skip to the scenario table below if you’re in a hurry.
| Find your scenario first Your situation Most likely cause Go to Older Mac, pre-2018 Intel or any pre-T2 model No T2 chip — Erase Assistant unavailable Fix 1 Intel Mac 2018–2020, not sure if T2 May or may not have T2 — check first Fix 1 Running macOS Catalina, Big Sur, or earlier macOS version too old Fix 2 Apple Silicon Mac with Monterey or later, still seeing the error Not a Volume Owner Fix 3 Work, school, or company-issued Mac MDM restriction blocking Erase Assistant Fix 4 Boot Camp Windows partition installed on Intel Mac Windows partition blocking the erase Fix 5 |
What is Erase Assistant and why is it not available?
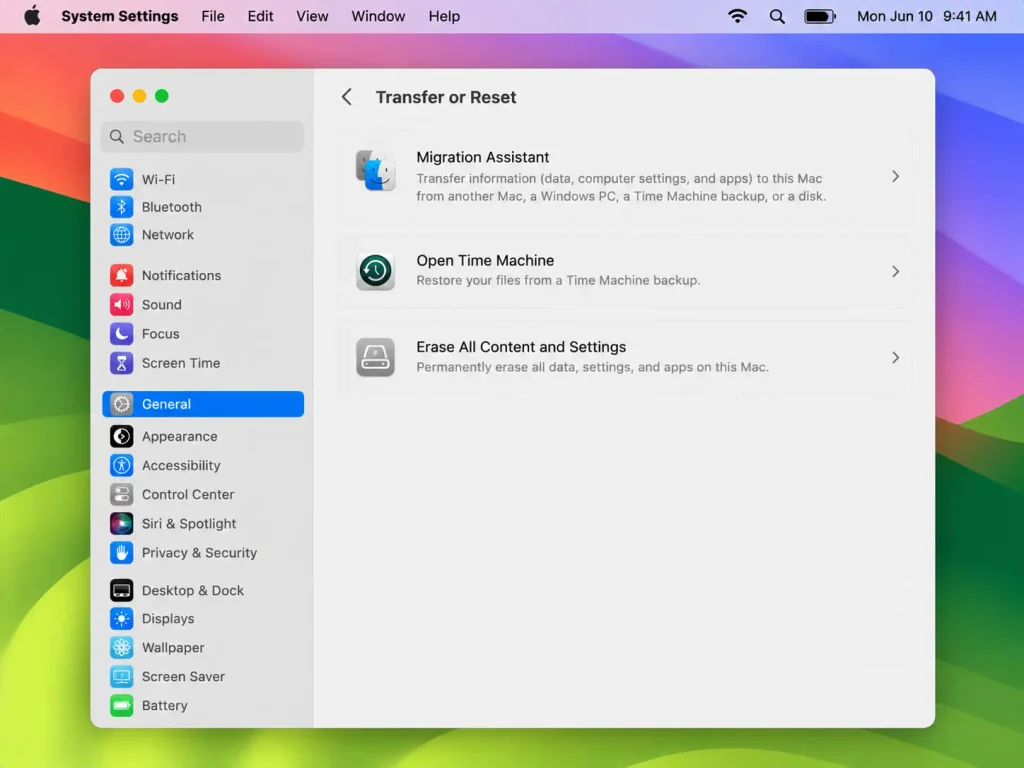
Erase Assistant is the macOS tool behind Erase All Content and Settings. When it works, it wipes all user data, signs you out of Apple services, and hands off a clean Mac ready for a new owner, in about four to five minutes, without needing to boot into Recovery Mode or reinstall macOS manually.
It requires two things simultaneously:
- Hardware: Apple Silicon Mac, or an Intel Mac with an Apple T2 Security Chip.
- Software: macOS 12.0.1 (Monterey) or later.
If either condition is not met, the option either does not appear in System Settings or shows the unsupported message when clicked. On top of these hardware and software requirements, two additional conditions can block it even on a fully compatible Mac: an MDM restriction deployed by an organization, or a Boot Camp Windows partition.
How to check whether your Mac supports Erase Assistant
Apple Silicon check
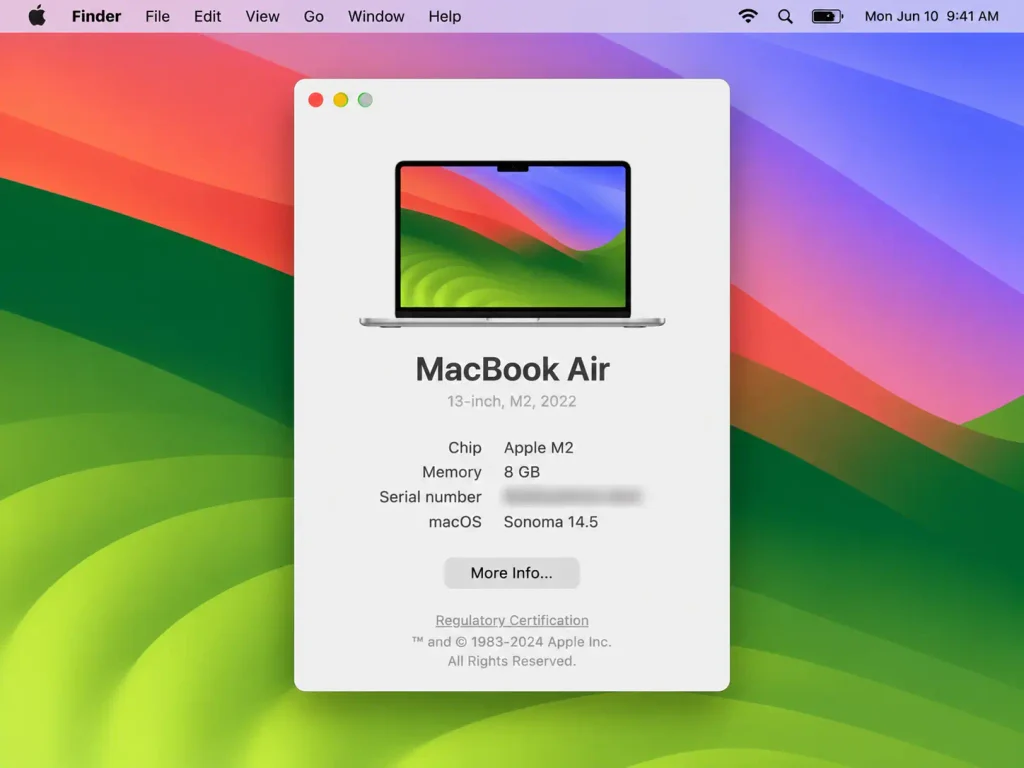
Go to Apple menu > About This Mac. If the window shows a Chip field (for example, Apple M1, M2, M3, or later), your Mac has Apple Silicon. Erase Assistant is supported on Apple Silicon Macs running macOS 12.0.1 or later.
Intel T2 chip check
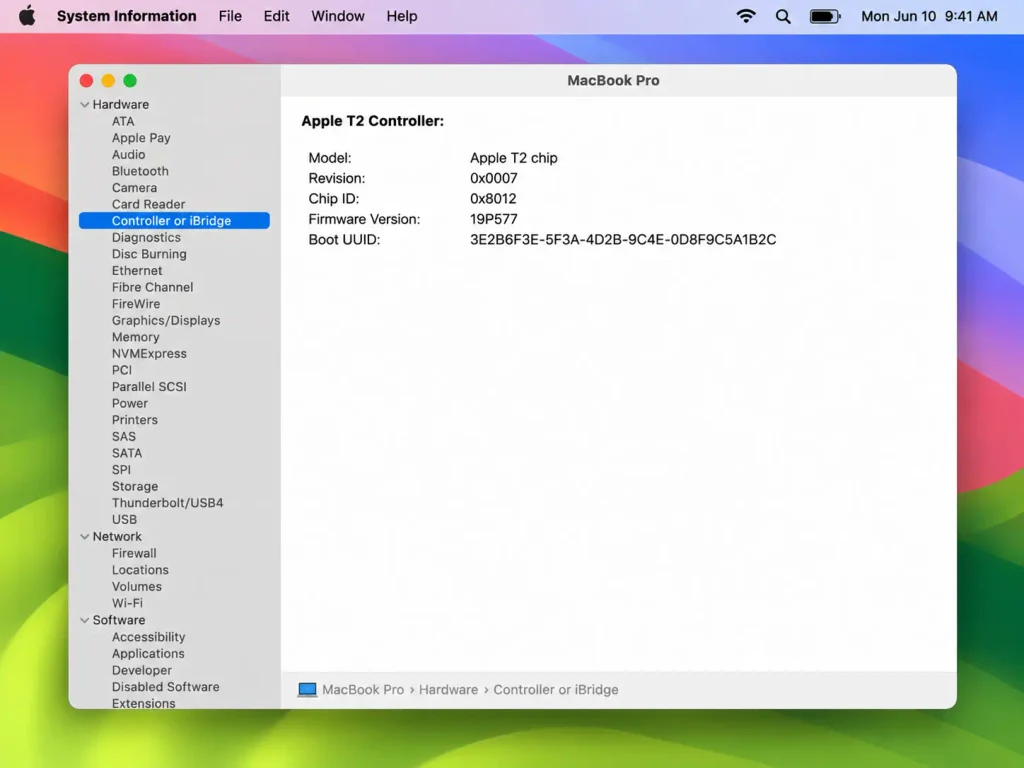
Hold the Option key and click the Apple menu, then select System Information. In the sidebar, select Controller (or iBridge depending on your macOS version). If you see “Apple T2 chip” on the right, your Mac has the T2 and supports Erase Assistant on Monterey or later.
| Intel Mac models with a T2 chip (per Apple Support HT208862) |
| MacBook Pro introduced 2018 through 2020 (excluding MacBook Pro 13-inch M1 2020) |
| MacBook Air introduced 2018 through 2020 (excluding MacBook Air M1 2020) |
| iMac (Retina 5K, 27-inch, 2020) and iMac Pro |
| Mac mini (2018) |
| Mac Pro introduced in 2019 |
Source: Apple Support HT208862 (support.apple.com/en-us/103265), verified September 2026. Intel Mac models introduced before 2018, except iMac Pro, do not have a T2 chip.
Fix 1 — Mac without T2 or Apple Silicon: use Disk Utility in Recovery Mode
If your Mac doesn’t meet the hardware requirement, Erase Assistant will never be available on it. The manual alternative is Disk Utility in Recovery Mode, which achieves the same result in more steps.
Before you start: sign out of iCloud (System Settings or System Preferences > Apple ID > Sign Out), deauthorize your Mac in the Music app (Account > Authorizations > Deauthorize This Computer), and back up anything you need to keep.
Enter Recovery Mode — Intel Mac
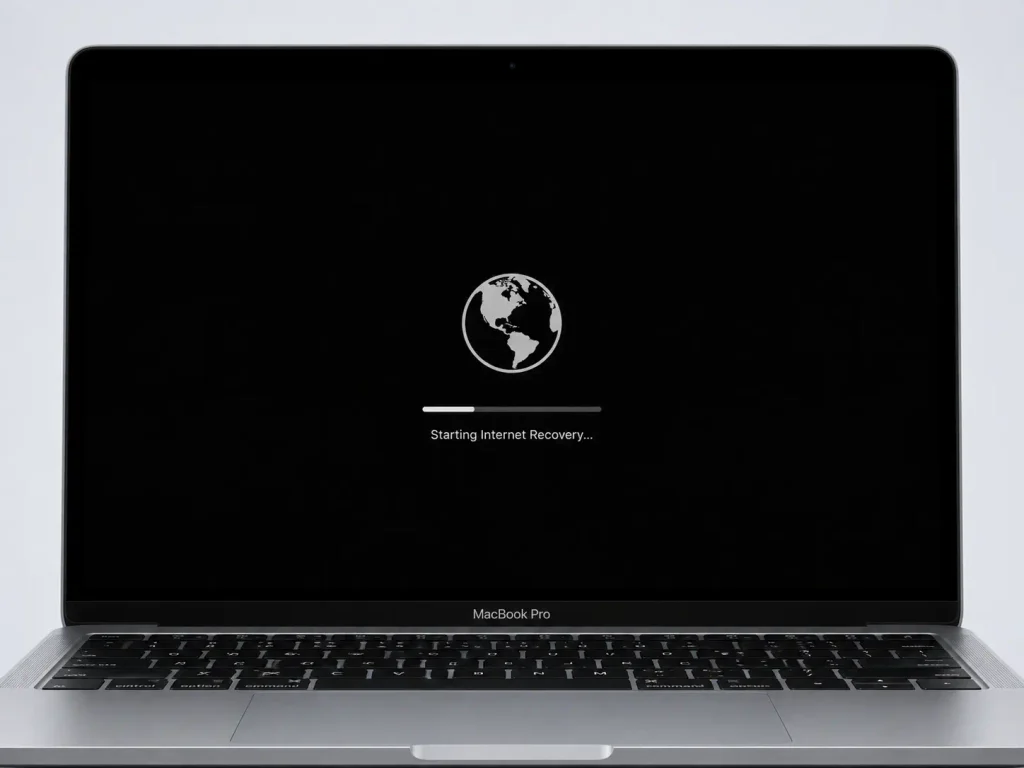
Shut down your Mac. Press the power button, then immediately hold Command + R. Keep holding both keys until you see the Apple logo or a spinning globe, then release. Do not press the power button and Command + R simultaneously — press power first, then immediately press and hold the keyboard shortcut.
Enter Recovery Mode — Apple Silicon Mac
Shut down your Mac. Press and hold the power button until you see ‘Loading startup options’ on screen. Click Options, then click Continue. Enter your admin password when prompted. (Do not use Command + R on Apple Silicon — that shortcut only applies to Intel Macs.)
Erase the drive using Disk Utility
- In the macOS Utilities window, select Disk Utility and click Continue.
- In the Disk Utility sidebar, select your startup disk (usually named Macintosh HD).
- Click Erase in the toolbar. If you see Erase Volume Group instead of plain Erase, use that — it erases all associated volumes including the Data volume.
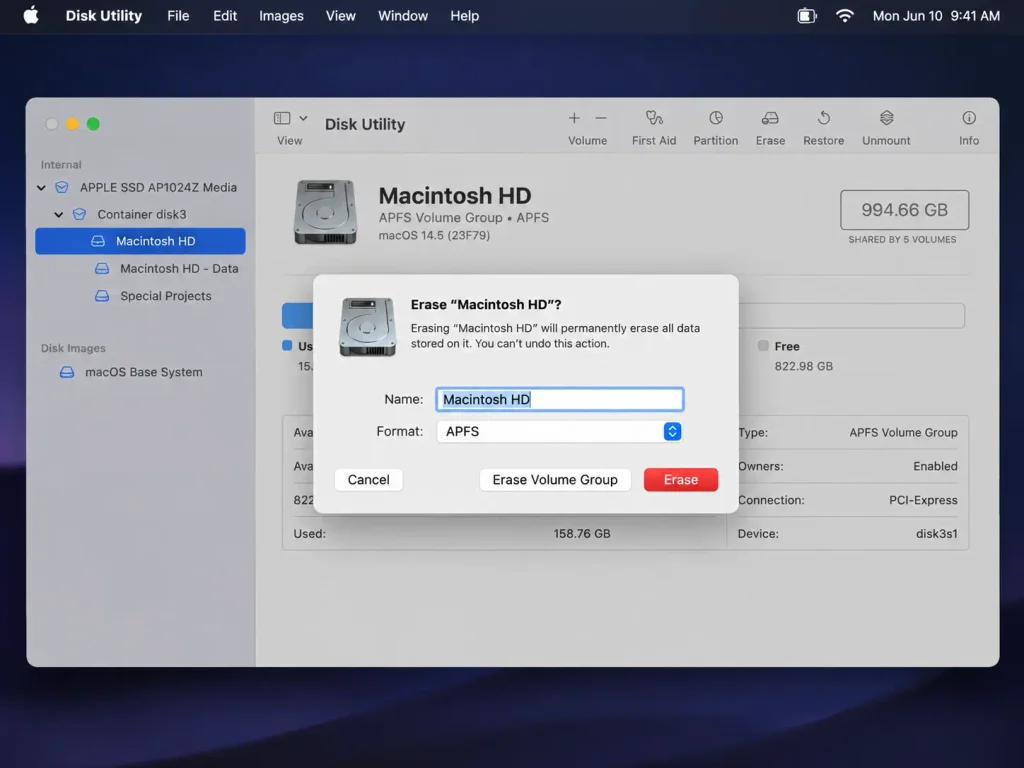
- Set the format to APFS (recommended for all modern Macs). Type a name for the disk.
- Click Erase (or Erase Volume Group). Wait for the process to complete.
- Quit Disk Utility. In the macOS Utilities window, select Reinstall macOS and follow the on-screen instructions.
Fix 2 — macOS version too old: update to Monterey 12.0.1 or later
If you have a T2 or Apple Silicon Mac but are running macOS Catalina, Big Sur, or an early Monterey release before 12.0.1, Erase Assistant either doesn’t exist yet or wasn’t introduced until the 12.0.1 patch.
Update your Mac first:
- Go to Apple menu > System Settings (or System Preferences on older versions) > General > Software Update.
- Install the latest available macOS version compatible with your Mac. On macOS Tahoe (the current release), Intel and Apple Silicon Macs are both supported. macOS Golden Gate (next year) will drop Intel support.
- Once updated to Monterey 12.0.1 or later, go to System Settings > General > Transfer or Reset > Erase All Content and Settings.
Fix 3 — Apple Silicon Mac still seeing the error: you may not be a Volume Owner
On Apple Silicon Macs, Erase All Content and Settings requires the logged-in user to be a Volume Owner. A Volume Owner is a user who authenticated to the Mac’s Secure Enclave during setup or after a migration. Standard user accounts created after migration from an Intel Mac, or accounts added later without this authentication step, may not have Volume Owner status even on a fully compatible, fully updated Mac.
How to check Volume Owner status
- Restart your Mac into Recovery Mode by holding the power button until startup options appear.
- When the screen shows user accounts, look for a note under your username.
How to grant Volume Owner status
In Recovery Mode, select the account you want to promote, click Activate, and authenticate with that user’s password. This grants the account Volume Owner status. After returning to macOS, try Erase All Content and Settings again.
Fix 4 — Work or school Mac: MDM restriction is blocking Erase Assistant
If the Mac is enrolled in a Mobile Device Management (MDM) system, such as Jamf Pro, Mosyle, Kandji, or Workspace ONE, an IT administrator can deploy a configuration profile that explicitly disables Erase All Content and Settings. When this restriction is active, the error appears even on a fully compatible Mac with the right macOS version.
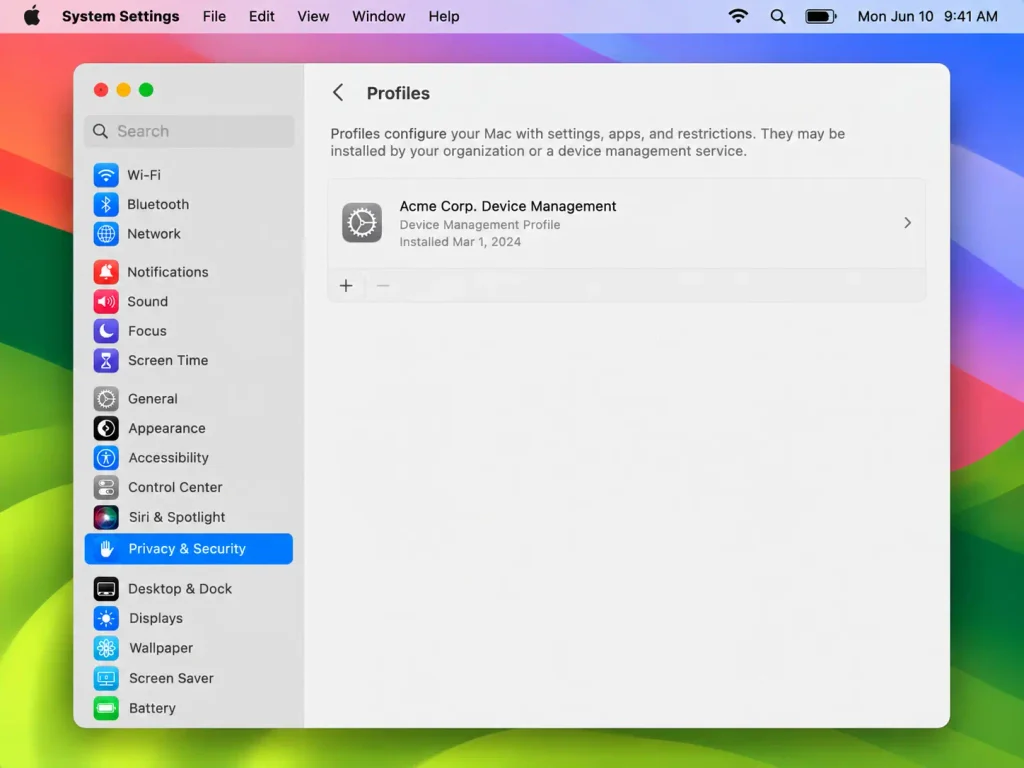
This is confirmed by Apple’s MDM deployment documentation and Jamf’s own support portal. The restriction works by setting the allowEraseContentAndSettings key to false in a configuration profile. There is no user-side workaround that bypasses an actively enforced MDM restriction.
How to confirm MDM is the cause
- Go to Apple menu > System Settings > Privacy & Security > Profiles (or System Preferences > Profiles on older macOS).
- If a device management profile is listed, the Mac is MDM-managed and this is likely the cause.
What to do
- Contact your IT administrator. Ask them to either remove the restriction, remove the Mac from MDM enrollment if you’re leaving the organization, or send an EraseDevice command from the MDM console on your behalf.
- If you purchased a secondhand Mac that shows MDM management, the previous owner or organization must remove it from their MDM before you can erase it. Apple Support can assist with Activation Lock removal in some cases but cannot remove a third-party MDM profile remotely. Search Apple Support for “Remove MDM profile” for current guidance.
Note: if the Mac is organization-owned, the restriction is intentional policy, not a bug. A user cannot override it without IT involvement.
Fix 5 — Boot Camp Windows partition: remove it first
If you installed Windows alongside macOS using Boot Camp on an Intel Mac, Erase All Content and Settings cannot proceed while a Boot Camp partition is present. macOS will show a message that other volumes need to be removed before Erase Assistant can run.
Boot Camp is Intel-only. Apple Silicon Macs cannot run Boot Camp. If you have an Apple Silicon Mac, this fix does not apply to you.
How to remove the Boot Camp partition
- Open Boot Camp Assistant (Applications > Utilities > Boot Camp Assistant).
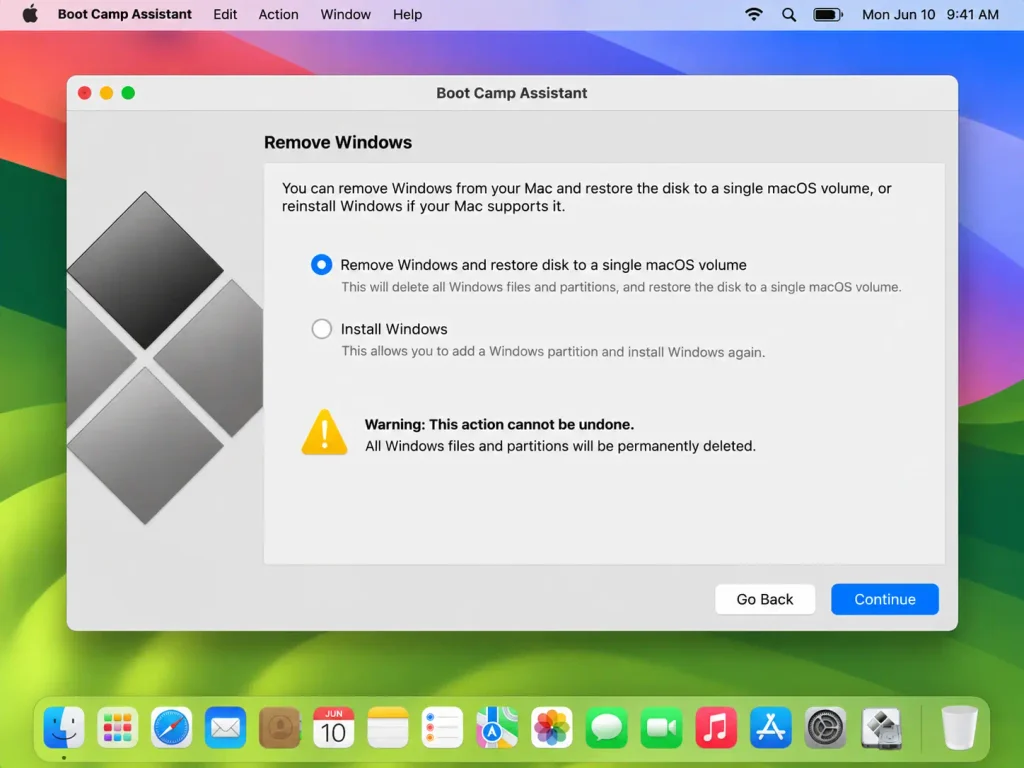
- Select Remove Windows 10 or later (the exact label may vary by macOS version).
- Follow the on-screen instructions. Boot Camp Assistant removes the Windows partition and restores the disk to a single macOS volume.
- Once the partition is removed, return to System Settings > General > Transfer or Reset > Erase All Content and Settings.
Before you erase: do these three things first
Regardless of which fix path applies to you, complete these steps before erasing your Mac.
- Sign out of iCloud: System Settings > Apple ID > Sign Out. This unlinks Activation Lock. If you skip this, the Mac remains tied to your Apple ID and the new owner cannot set it up without your credentials.
- Deauthorize this Mac in the Music or Apple TV app: Account > Authorizations > Deauthorize This Computer. Each Apple ID allows five authorized computers; deauthorizing frees a slot.
- Back up what matters: Time Machine (System Settings > General > Time Machine) or manually copy files to another drive. Erasing is irreversible regardless of which method you use.
Frequently asked questions
Why is ‘Erase All Content and Settings’ not showing on my Mac?
The option only appears on Macs with Apple Silicon or an Intel T2 Security Chip, running macOS 12.0.1 (Monterey) or later. On any other Mac, the option doesn’t exist. Use Fix 1 above.
Does my Intel Mac have a T2 chip?
Hold Option and click Apple menu > System Information. Select Controller or iBridge in the sidebar. If it says Apple T2 chip, your Mac has one. Only Intel Macs introduced between 2018 and 2020 (certain models) have the T2. Intel Macs before 2018 do not.
Can I erase my Mac without Erase Assistant?
Yes. Boot into Recovery Mode, open Disk Utility, select the startup disk, click Erase Volume Group, then reinstall macOS from the Utilities window. This achieves the same result as Erase Assistant but requires more steps. Full instructions are in Fix 1 above.
Why is Erase Assistant blocked on my work Mac?
Your IT administrator has deployed a configuration profile that restricts Erase All Content and Settings. This is an intentional MDM policy, not a bug. Contact IT to have the restriction removed or the device wiped on your behalf.
Does erasing my Mac with Disk Utility remove everything?
Using “Erase Volume Group” in Disk Utility removes all user data, settings, and apps. The result is the same as Erase Assistant. Reinstalling macOS afterward returns the Mac to a clean out-of-box state.
What do I do if I have Boot Camp Windows installed and want to erase my Mac?
Remove the Boot Camp partition using Boot Camp Assistant (Applications > Utilities > Boot Camp Assistant) first. Once the Windows partition is gone, Erase All Content and Settings in System Settings can proceed normally. Full steps are in Fix 5 above.

